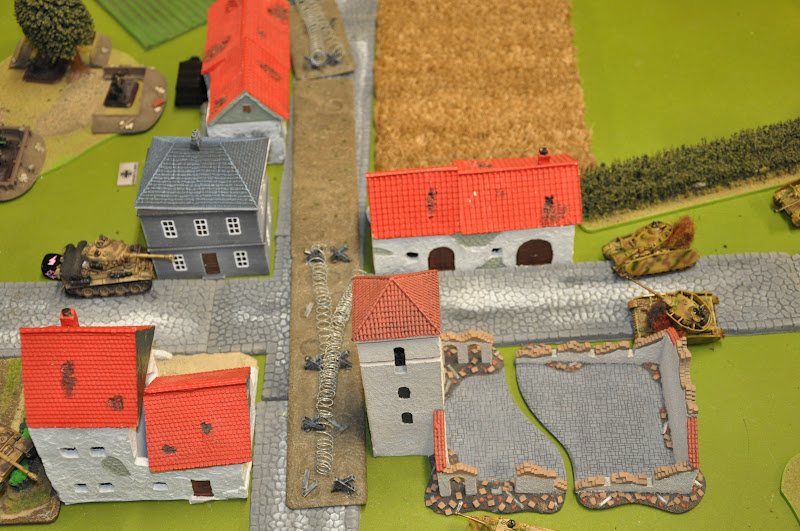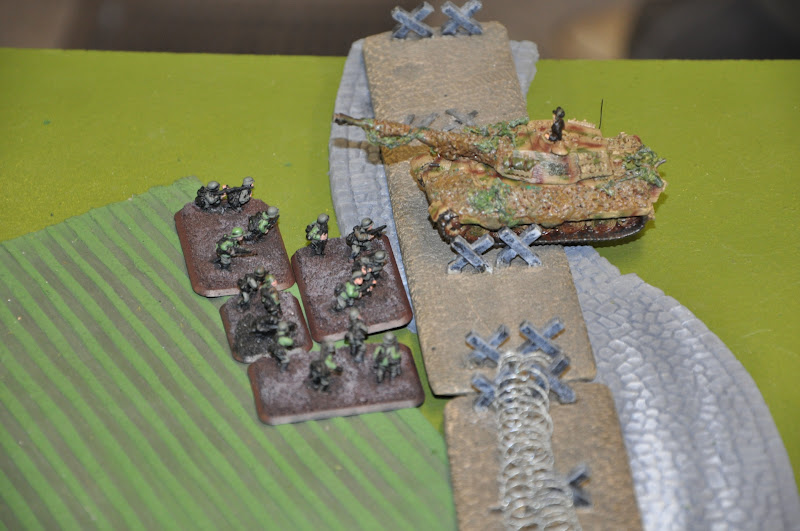
Tiger lurking in the town behind wire and mines!
This game was in preparation for the Nov LW, 1650 tournament which will be held at Perkins Hobby House. If you haven't signed up already you can contact Gary by email or phone to do so, details are here. Or visit the Petawawa Miniature Soldiers forum. I played against Luggs and we decided to roll for the mission, which ended up Hold the Line. As I'm playing Mech infantry vs Tanks I would be defending. |
Panzer Pioneers
|
Kampfguppe Piper
|
SETUP AND DEPLOYMENT
 |
| Objectives are in the furthert back wood to the left of the road and in the green field on the far side of the road going right. |
 |
| One Pioneer platoon dug in on the objectve. |
 |
| The other platoon on the objective protected by wire and mines! |
 |
| Luggs KT and IV J's ready to move out |
 |
| On the other flank the Pumas and AA ready to advance |
 |
| In the centre the Kampgruppe of the 2IC and a tank are ready to lead the OC, Piper and the Cannon platoon |
 |
| 10.5cm guns ready to bing the rain. |
Panzer Pioneers
|
Kampfguppe Piper |
| Panzer Pioneers: I deployed both Pioneer platoons with obstacles into dug in positions with one platoon having a belt of mines or wire stretching from the centre of the table to the very edge. The Tigers went into Ambush with the remainder in reserves. Kampfguppe Piper: Luggs spread his forces out with the intent of pushing all up front. The obstacles proved to be a big problem as his list has nothing that can clear them. The wire wouldn't be a problem for the tanks but would for everything else. | |
TURN 1
 |
| Pumas race forward ready to lift gone to ground covered by the AA guns |
 |
| 2IC's platoon leads the way down the road followed closely by the OC and Piper |
 |
| The King rumbles forward |
 |
| The Tigers spring from ambush! |
 |
| Knocking out the Kampfgruppe in a single volley! |
 |
| Then using their stroom trooper move to challenge the Pumas |
| Panzer Pioneers |
Kampfguppe Piper
|
| Panzer Pioneers: Springing the ambush was a little sooner than I was planning but I'm happy with it taking out a platoon. The obstacles are doing what I hoped they would do, forcing him to go left. I also realized that I should have put the minefield on the far left where I have less ability to effect his movements. Kampfguppe Piper: Luggs agreed that he shouldn't have made the Kampfgruppe it would make more sense to keep the platoon at full strength. Also, having them roll up the middle wasn't the best use of the Pumas who should have been out front protecting the army from ambushes. | |
TURN 2
 |
| The Pumas react to the Tiger, racing for cover. |
 |
| At the same time the AA guns back off and spread out. |
 |
| In a stroke of bad luck the IV J's coming out of the woods bogs two... |
 |
| Sensing opportunity the Command Tiger moves to engage the lone IV J... |
 |
| The IV J is no match to the might of the Tiger and is destroyed. Despite being fearless the platoon flees! |
 |
| On the other flank the Tiger knocks out an AA gun |
Panzer Pioneers
|
Kampfguppe Piper
|
| Panzer Pioneers: The Tiger ambush and this turn of shooting were way more successful than I thought it would be. Hopefully I get reserves in next turn to shore up the back objective in the event the Pumas bounce and head for the back of the table. Kampfguppe Piper: The Panther and KT are the only guns Luggs now had that I would need to worry about for my Tigers. His luck this turn was unbelieveably unlucky. With the left flank stalled because on the Tiger and the KT left alone on the right options are becoming limited. | |
TURN 3
 |
| The KT doesn't care about wire, he doesn't give a S&^t, just like a honey badger. |
 |
| Pumas bounce and try to disengage from the Tiger only to lose one to the newly arrived Marders |
 |
| A small group of Pioneers lead by their platoon commander and his faust assault the KT killing it! |
Panzer Pioneers
|
Kampfguppe Piper
|
| Panzer Pioneers: The Tigers knocked out another AA gun but they pass their motiviation. The newly arrived Marders knock out a Puma. The Pioneers assault the KT and which out losing a stand take it down. Kampfguppe Piper: With 3 platoons gone and the OC and Piper being the only platoons who may have a chance of knocking out the Tigers. Things are looking grim for Piper's force. | |
| At the top of 4 Luggs called it. This was the first time playing with wire. I can see how it would be really useful for dictating where the enemy moves. It also demonstrated that having Pioneers or at least some infantry is important for breaching obstacles. The armies and mission really contribed to the game being a 6-1, I think that next time Luggs and I play I won't be so lucky. |
Generated by WWPD's BatRepper Software.

No comments:
Post a Comment