
 Crocs roast some Grenadiers! |
Tyne and Tees
| Lehr Grenadiers
|
TURN 1
 |
| Objectives were behind the wheat field and woods in the background and behind the woods and beside the hill on the left in the foreground. |
 |
| Grenadiers and PaK 40's guard the right German objective |
 |
| Heavy Mortars hold the left German objective |
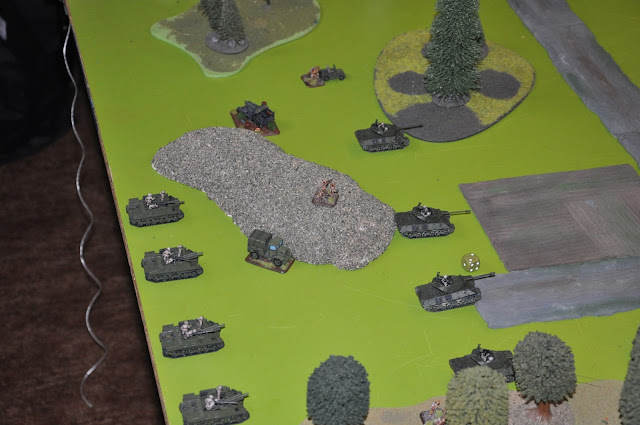 |
| Achilles ready to roll out while Priests hold the objective |
 |
| UCs prepare to hold the right flank |
| Tyne and Tees | Lehr Grenadiers
|
| Tyne and Tees:Achilles double forward ready to engage the Heavy Mortars next turn. Lehr Grenadiers:Grenadiers advance on the UCs unable to hurt the elusive UCs | |
TURN 2
 |
| The Battery Commander joins the Achilles who move into shoot and then assault the Heavy Mortars wiping them out. |
 |
| Grenadiers destroy 2 x UCs and advance into the wheat fields only to be hammered by the Priests |
| Tyne and Tees | Lehr Grenadiers
|
| Tyne and Tees:Achilles wipe out the Heavy Mortar platoon and consolidate onto the objective setting the conditions for a turn 3 win. Lehr Grenadiers:Grenadiers destroy 2 x UCs and the remaining UC passes its motivation check and successfully pulls back. | |
TURN 3
 |
| Achilles hold the objective at the start of the turn while the 6 pdrs double forward to reinforce |
 |
| PaK 40 opens up and destroys a Priest at range |
 |
| The AOP calls down 105mm rain again killing another 3 stands |
Tyne and Tees
| Lehr Grenadiers
|
| Tyne and Tees:The game was officially over here due to the scenario. Clockwerks77 and I agreed that we both wanted to keep playing for fun. Achilles held the objective waiting for the 6 pdrs to get into position. Priests hammer the Grenadiers again knocking out 3 stands Lehr Grenadiers:Pak 40s knock out a Priest and the Grenadiers continue to try and knock out the remaining UC | |
TURN 4
 |
| Achilles move out in tight march discipline |
 |
| 6 pdrs dig in on the objective ready to hold it against the coming German reinforcements |
 |
| The AOP continues to hamper the Grenadiers knocking out another half track and 2 more stands |
Tyne and Tees
| Lehr Grenadiers
|
| Tyne and Tees:Achilles move out to be more responsive to German reinforcements while the 6 pdrs dig in on the objective. The Priests continue to hammer the Grenadiers. Lehr Grenadiers:Grenadiers finally knock out the final UC but allow the Observer Sherman to escape | |
TURN 5
 |
| OP Sherman sneaks in behind the gun shields of the PaK 40's knocking one out. |
Tyne and Tees
| Lehr Grenadiers
|
| Tyne and Tees:OP Sherman knocks out a PaK 40 while the Achilles move to be prepared to protect the objective. Lehr Grenadiers:Grenadiers continue to | |
TURN 6
Tyne and Tees
| Lehr Grenadiers
|
| Tyne and Tees:Crocs arrive from reserve finishing off the Grenadiers. Achilles move to position for the eventual arrival of German reserves. Lehr Grenadiers:At this point Clockwerks called it so we packed up and headed upstairs to see how everyone else was doing. | |
| This game was dominated by the scenario and how we chose to deploy objectives and which platoons were deployed. I now know that I will almost always put my objective in the centre of the board and ensure that which ever platoons I deploy need to be able to defend well from an assault while holding an objective. I ended up pulling out a 6 - 1 victory. Let me know if you like the battle reports this way I'm using the batrep software developed by WWPD. I like the interface, its a little different but I think it will save a lot of time. Stay tuned for round 3 coming soon! |
Generated by WWPD's BatRepper Software.
Clockwerk made the fundamental error of thinking that a platoon of gun teams can defend an objective, i've done the exact same thing you did once to a guy playing russians who thought his Heavy mortars could defend. In his place i would have chosen the Paks, Panzer IV's and some Lehr grenadiers, oh well i'm sure he will remeber this next time.
ReplyDeleteI agree, I will definitely take that into consideration when deploying for this mission in the future.
ReplyDeleteYup, agreed. A key issue of mine recently has been forgetting about using the double-time rule and thus not taking into consideration the true threat-range of a unit. In this case it was a critical mistake made at deployment.
ReplyDeletewas there anything missing from clockwerks list because by my calculations it comes to 1350 points?
ReplyDelete@Stormtrooper, I forgot his Pumas (which I've now edited in) thanks for the catch.
ReplyDelete@Clockwerks, I think it was just the Pumas I missed. Otherwise does the list look about right?
@Big_Willie, yup looks right. HQ was 1iC, 2iC and Panzershrek upgrade. Sad that the Pumas never game on. Love em! BTW, I'm stealing some of your pics for my newly created blog www.clockwerk-warriors.blogspot.com of our game. Hope you don't mind. Trying to drum up some attention in Calgary to get us a good club going. ;)
ReplyDeleteWho chose first in deployment and who had first turn?
ReplyDeleteI've come to learn that Encounter is all about what platoons you choose, you see had it been me i would have taken the Pz IV's,Pumas and a platoon of Panzergrenadiers, this gives you a mobile defence or a good counter attack force.
I also would have deployed my entire force behind that huge rocky hill in Clockwerks right hand corner, thus not allowing my opponent my intentions, hopefully.
@Stormtrooper. I had both first deployment and first turn. I was hoping to get him to place his Grenadiers on the other objective (to give the Achilles main guns something to shoot at). I think that Clockwerks and I are still learning a ton about the game.
ReplyDelete@Clockwerks of course you can use pictures. I'm adding you to my blog roll now can't wait to see your work!
Awesome! Also awesome to see Batrepper in use some more :) I am working on 0.4 right now. I've added a deployment/setup step and worked out a bit more of the formatting issues.
ReplyDelete@Indie. Thanks for making it avail able and congrats on the reinforcements!
ReplyDelete